If you want to measure what is your internet speed and how much you have consumed your internet bandwidths there are small tools that can work as a Internet Speed Meter for Windows 10.
Most of time when we want to what internet speed we are getting on our pcs we normally go on the browser and search for internet speed testing website but in this article i will share the free way to monitor your internet speed on your windows 10 desktop and even you can monitor internet speed statistics on your taskbar.
`Learning about you internet connection can help you identify the internet usage lets assume you have a limited internet connection and you want to monitor the bandwidths and control the usage.
Best Internet Speed Meter for Windows 7/8/10 32bit | 64 bit
Here I am going to share the possible ways to monitor the internet speed and usage on your windows pc either you are using Windows 7 / 8 or 10
Method-1 : Net Speed Meter for Windows 10
If you want to monitor Internet speed right on your taskbar in windows 10 then Microsoft store offers you a quick utility which is available on Microsoft windows store called Net Speed Meter you can simply search on Microsoft Store.
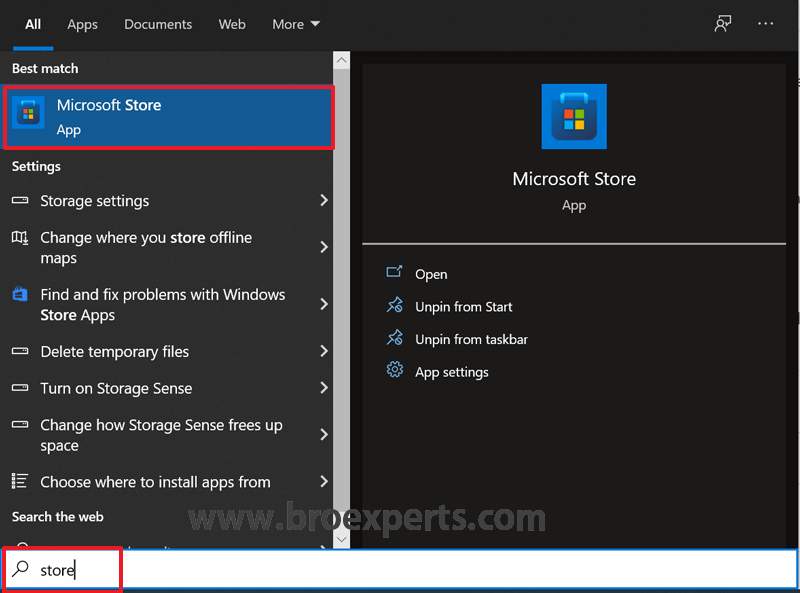
Click on Start and type “Store” in search box and click on “Microsoft Store”
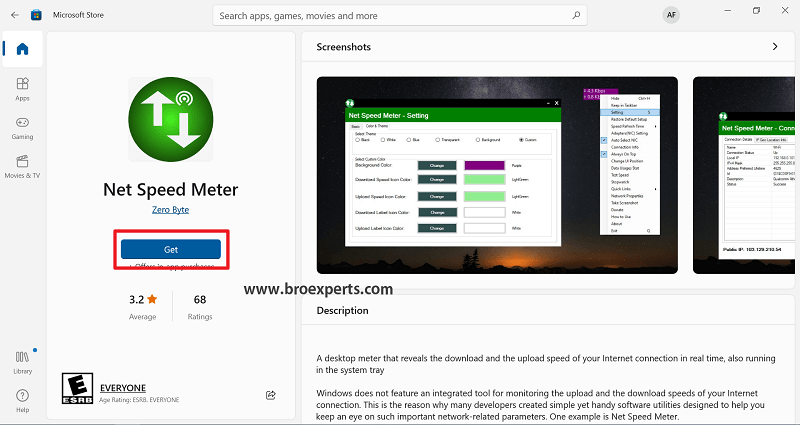
Now search “Net Speed Meter” in Microsoft Store and click on “Get” button to download the app on windows 10.
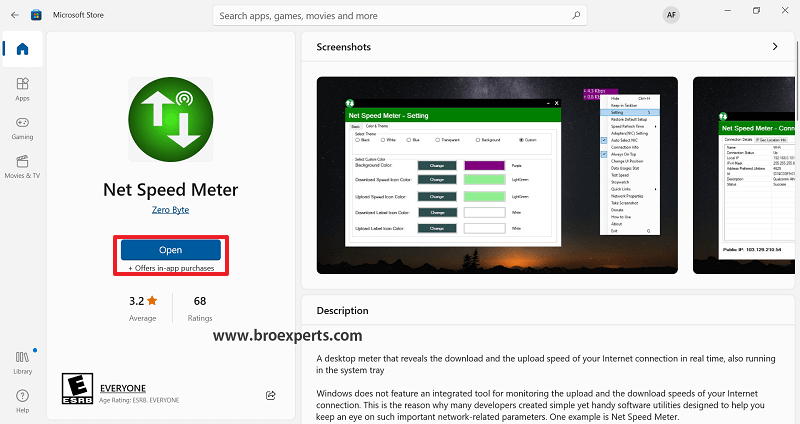
Now Click “Open” to launch the Net Speed Meter app in windows 10

Now you can see on your desktop a meter which indicated the stats of download and upload speed currently you are receiving, Net Speed Meter can detect automatically you current active Interface.
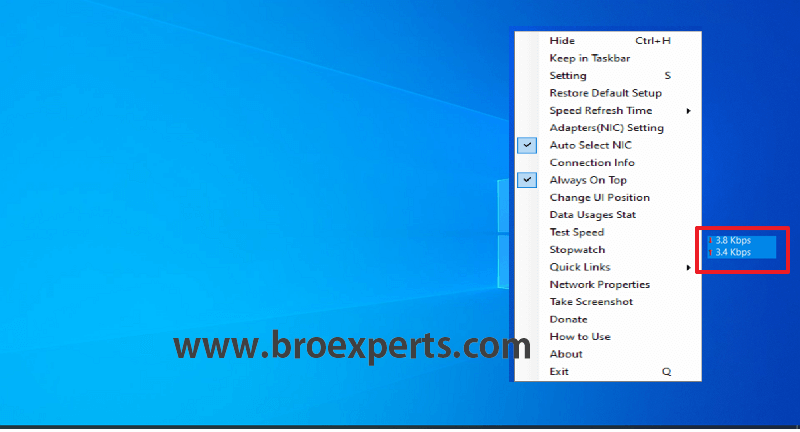
Here you can right click on the small meter and find out there are options to configure as per your requirements to monitor Internet speed in your windows 10
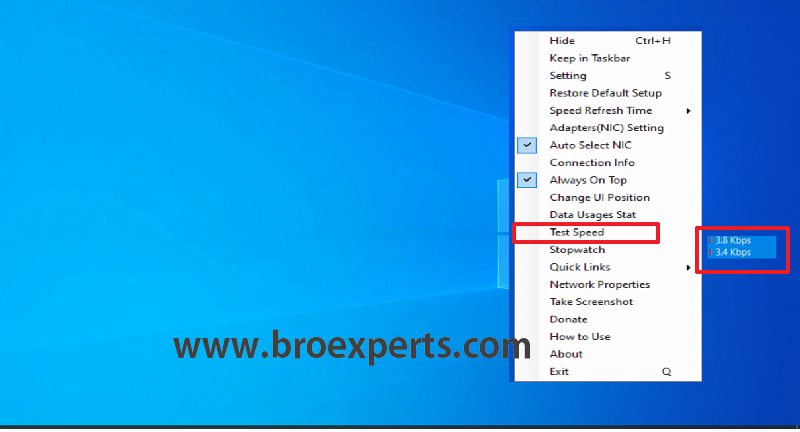
If you want to test the current Internet Speed of your Connection in Windows 10 you can run the test by right clicking on the meter icon and click on Test Speed
Method -2 Internet Speed Meter for PC Windows 10,8,7 (32bit/64bit) Free
NetSpeedMonitor Utility is a handy piece of software that can monitor your internet connection on windows in real time you can keep a record of your internet usage.
This useful Internet Speed Monitoring software is a great tool to know the live usage of your internet during browsing, uploading or downloading the content from the internet.
You can download for an older version of windows as well such as windows 7, 8, or the latest windows 10 it has support for both 32bit or 64bit operating systems.
Net Speed Monitor is freeware software that lets you see real-time data of your internet connection, let me show you how to download and test the Internet Speed on Windows 10 Pc.
Download NetSpeedMonitor Software for Windows PC
If you want to download for windows 7 or for an older version of windows you can download as per your windows system architect 32-bit or 64-bit.
If you want to install NetSpeedMonitor Software on Windows 10 you can download the below 64-Bit version.
I will show you step by step process to Install Internet Speed Meter on Windows 10 Pc.
Once you download the setup file you need to double click on the setup file, you will see the below error stating that “Operating System Not Supported (Windows XP, Windows Server 2003, Windows Vista, or Windows 7)”
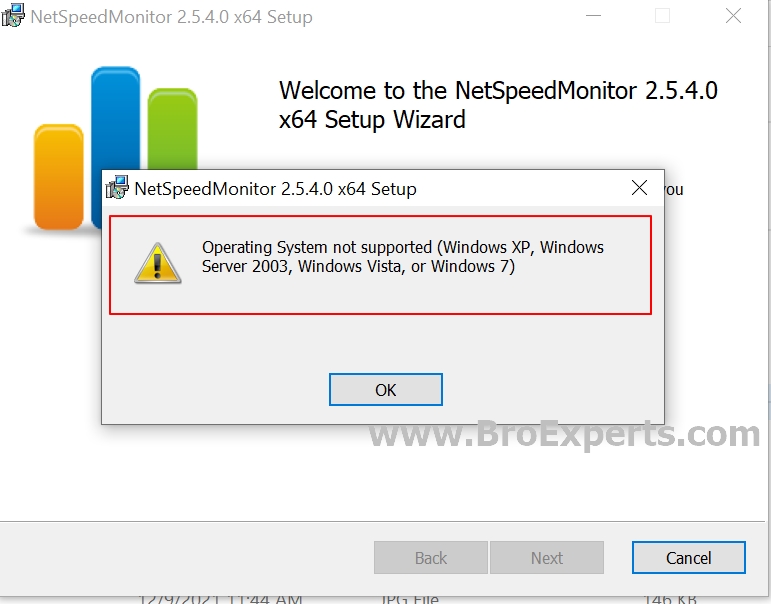
You can see the above message now here we have to make changes so we can run this file on Windows 10 Pc.
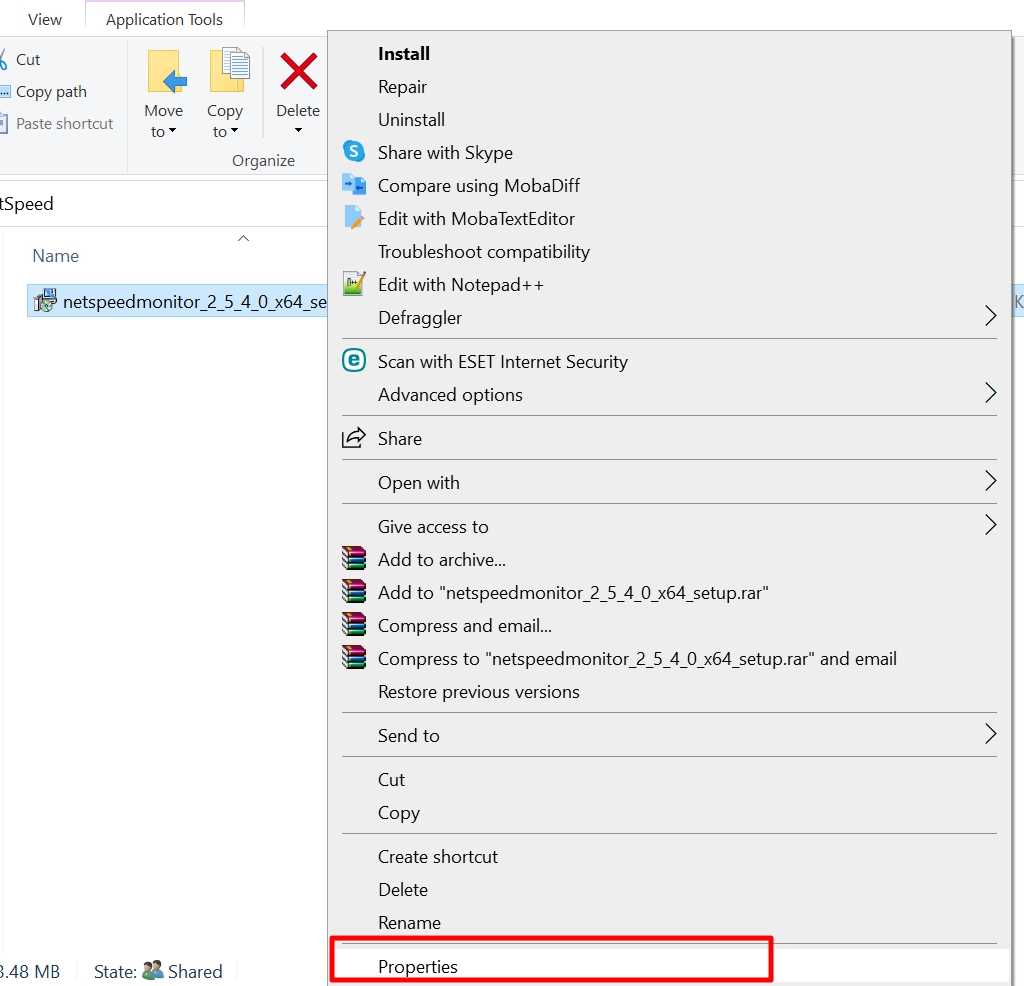
Right Click on the Setup file and click on “Properties”
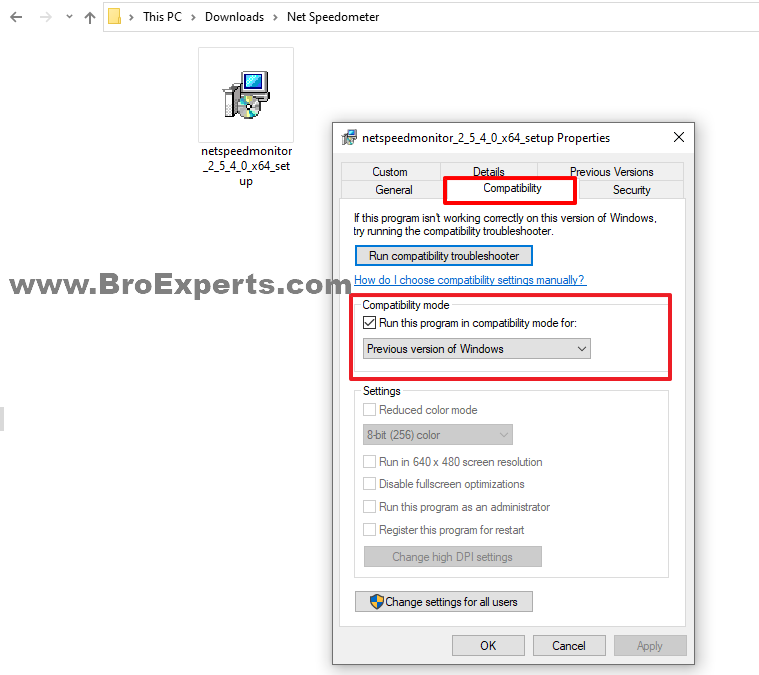
After clicking on the “Properties” in “Compatibilty Section” under “Compatibilty mode”select the check sign besides “Run this program in compatibilty mode for Previous version of Windows” and click “Apply” and “OK”.

Now again click on the “Setup” and “Run” the setup.

Click on the “Next” button

Click on the check sign besides “I accept the terms in the License Agreement” and click “Next” button
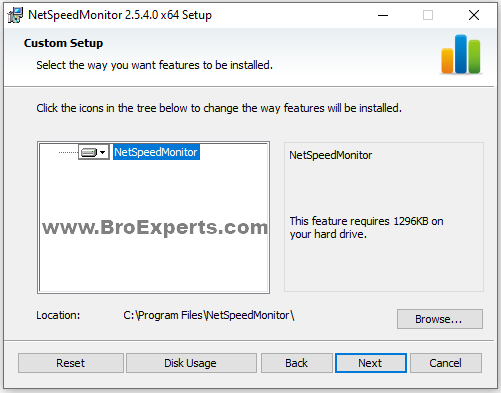
Click on the “Next” button
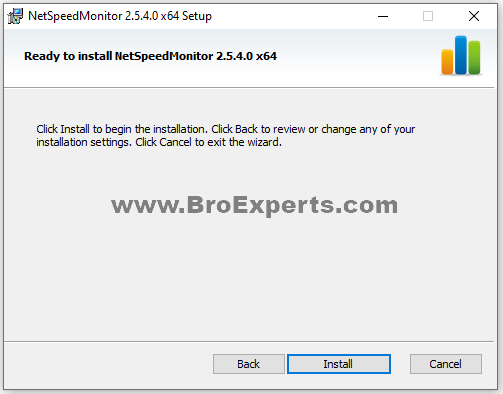
Click on the “Install” button
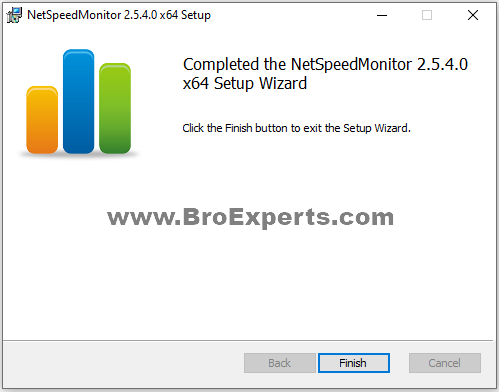
Now click on the “Finish” button that’s all you are done installing the software.

After installation go to “C: Drive” and in “Programe Files” folder find “NetSpeedMonitor” and create desktop shortcut of the software.
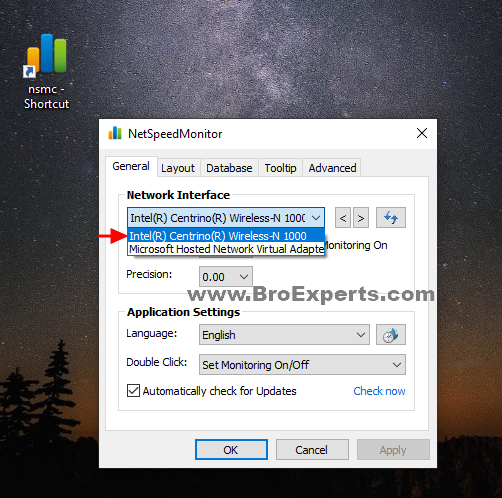
Double click the shortcut of “NetSpeedMonitor” and in this window under “General” option select your “Network Interface” to “Wireless” and then click Apply and OK.
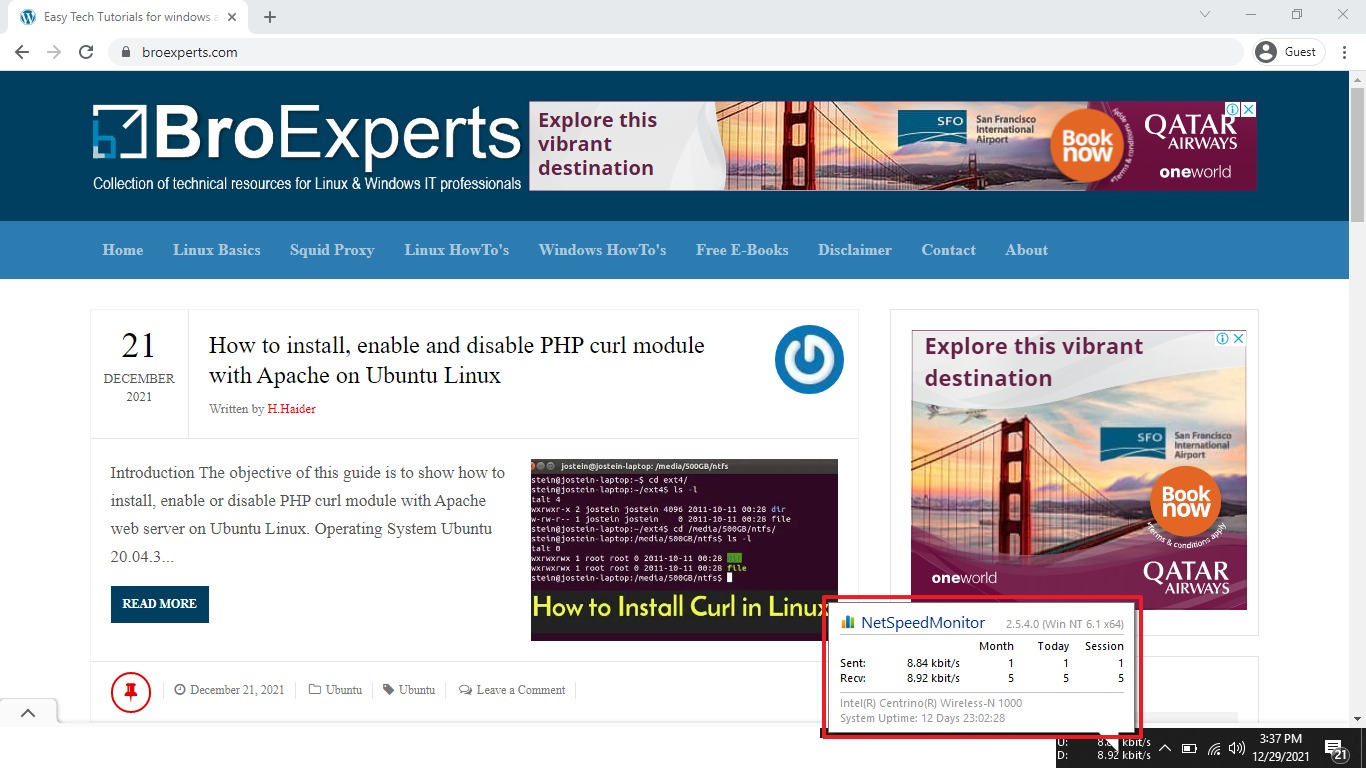
Now you can monitor your “Internet Speed” in your taskbar and can record it on “Daily and Monthly” basis with “Sessions Information” It is super easy to use and a quite helpful software.
Enjoy the Software